bog.0b.ee
Correcting for an unevenly lit film scan with Darktable.
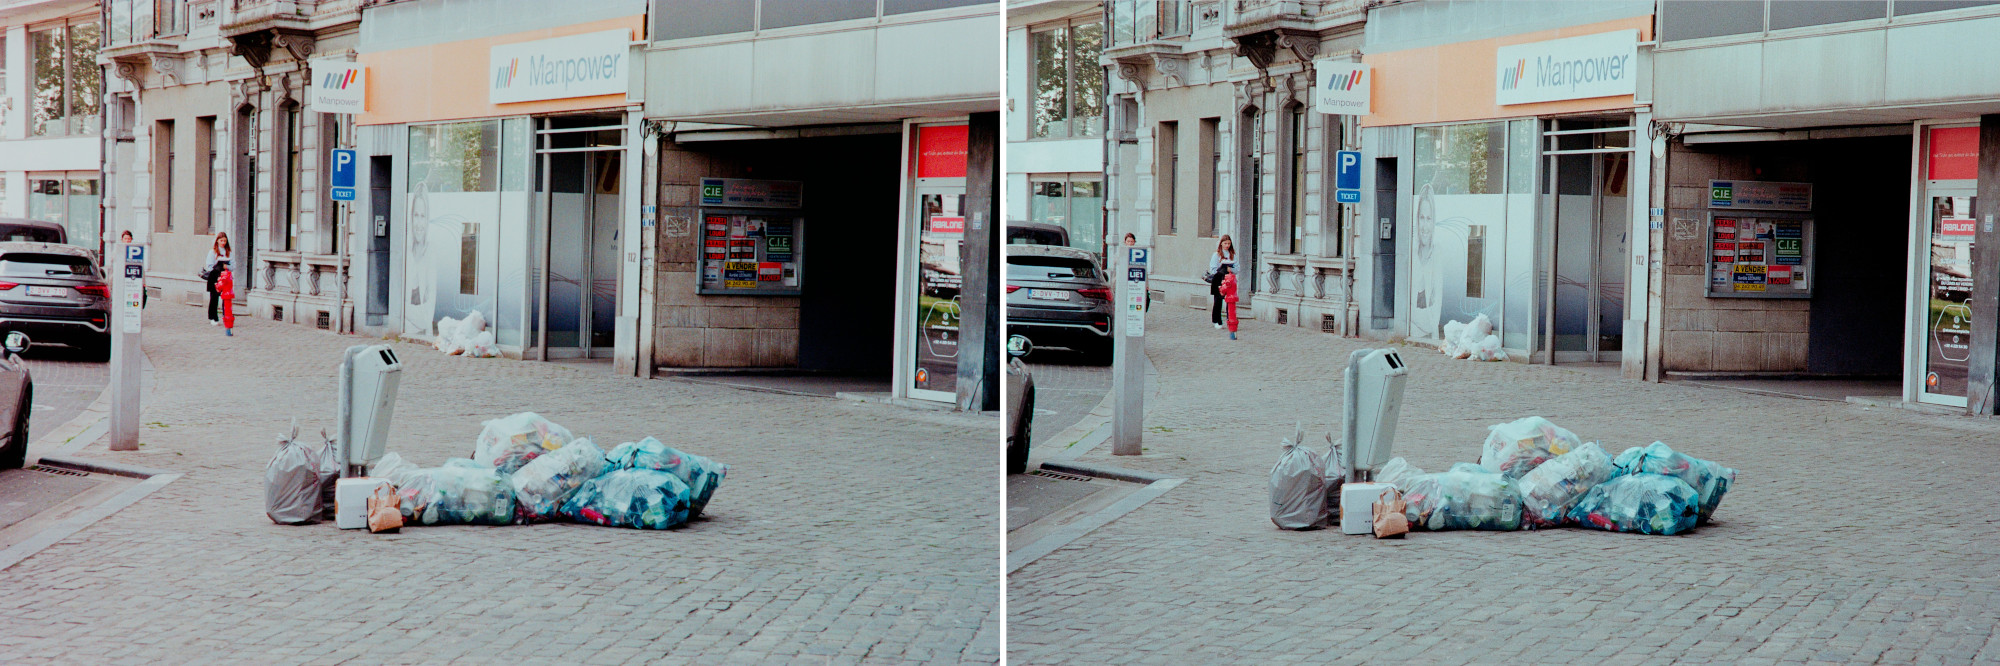 The scan on the left has a color cast caused by an uneven backlight. In this post we will correct for it using a scan of an empty section of film.
Intro
Following the advice of Scanlight by jackw01 I built myself a narrowband RGB light source using a cheap RGB LED panel from AliExpress, a barely functioning 3D printer, a diffuser sheet scavenged from a broken monitor and several burn wounds worth of hot glue. Armed with this new device I enthusiastically proceeded to scan all of the unscanned film that I had acquired up to that point but after processing a few of them in Darktable I noticed a slight color cast on the edge of one of the images. In fact, all 15 rolls had the same color cast.
*sigh*
After a few more *sighs* I went across my scanning setup back and forth excluding the camera, the lens, the pz35, the negatives themselves and confirmed that, sure enough, the backlight is to blame. I did not want to go back to using my OLED phone nor was I amused by the prospect of rebuilding this thing and I definitely did not want to use some other light source so the only course of action seemed to be to somehow correct for it in software.
Fixing with color correction, exposure and masks
At first I tried to correct the cast using the color correction module and the exposure module both with a gradient mask. This worked but dialing in the settings and the mask was tedious work and the result was still not great. Also the same settings did not work for other images meaning that each photo would have to be dialed in separately. Not good.
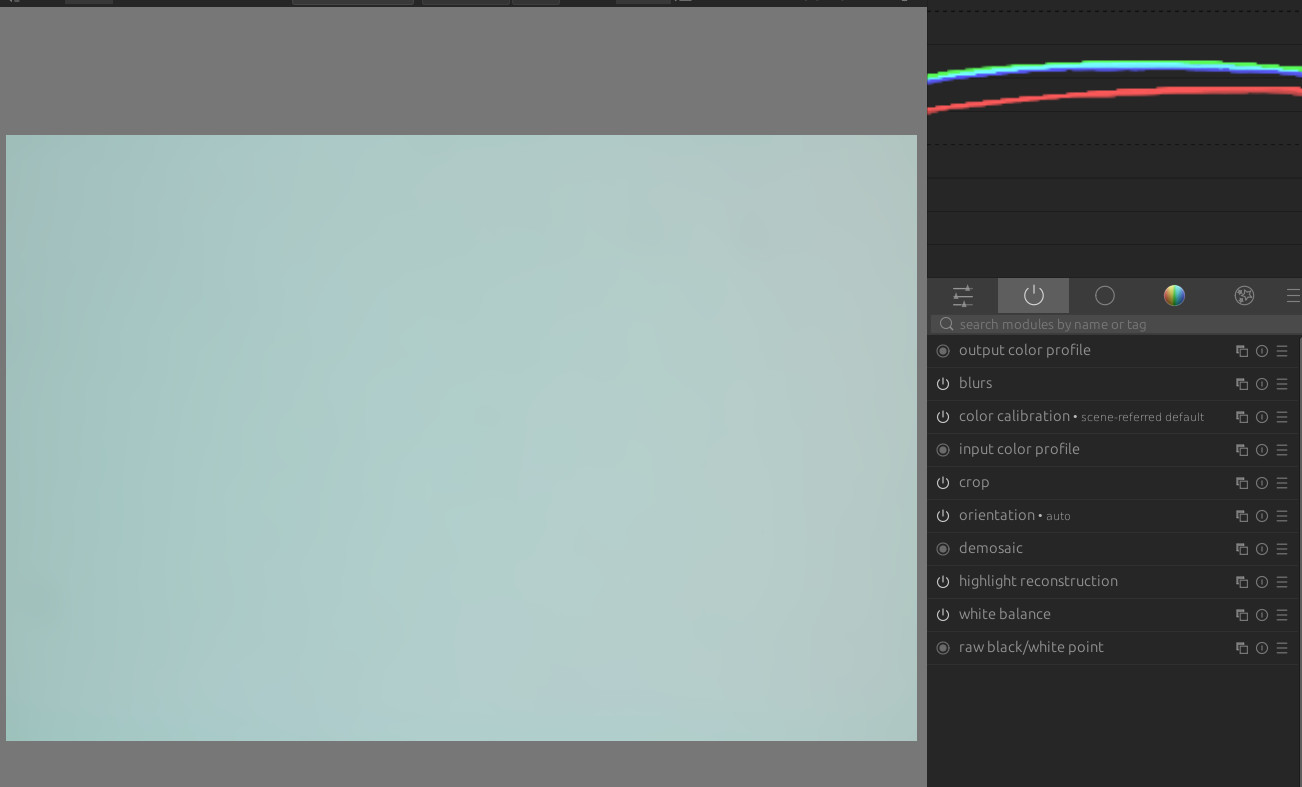
I then had the idea to scan an empty section of the to film visualize the unevenness. Doing this made the issue quite obvious:
![]() Side note: The RGB LED is white balanced to the orange film base. I also like to set the custom white balance from my camera to the film base hence the base here is not orange. This also makes the visualization easier to view
Side note: The RGB LED is white balanced to the orange film base. I also like to set the custom white balance from my camera to the film base hence the base here is not orange. This also makes the visualization easier to view
With a uniform backlight, the RGB channels should be straight lines across and they should all be evenly spaced with each other. Here however the image is darker around the edges and the red channel deviates from the green and blue channels quite a bit. The latter is the culprit for the color shift.
My first idea was to try and calibrate for this using various masks and modules however this again was quite tedious and ultimately did not really take me anywhere. Then I realized that the photo of the empty film base against the backlight is itself a perfect mask of all of the errors in the backlight. If only I could convince Darktable of that fact.
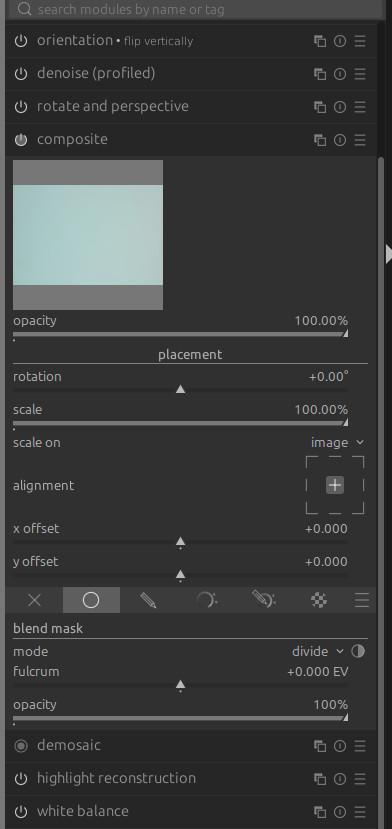
Composite and division blend
Here is what I eventually came up with: Using the composite module with a uniform blend mask with the “divide” mode. Here is how:
First take the base image, Disable sigmoid and exposure and crop out any scanner edges.
Apply a blurs with linearity=0 and radius=32px. This turns the image into a nice even gradient with any dust and imperfections smoothed out. Keep in mind that the blurs module is quite computationally expensive so the radius should be no more than needed. It’s also a good idea to save the history stack of this image into a style that can later be used on other rolls of film.
Next take your scanned negative and move the blurs module to be begininning of the pipeline. This is needed because there is a quirk in how the composite module operates.. If the blurs module is not moved then the previously applied blur will be ignored by the composite module. The mask will still work but it will not be blurred.
After this is done enable the composite, select the mask as the image and select the uniform blend mask with mode divide. Move the composite module to the beginning of the pipeline.
Important: The composite module must be before the orientation and rotation modules in the pipeline. Not doing this would cause the mask to be applied in the wrong orientation to the image.

And done!
This masking also cancels out the color of the film base meaning that now negadoctor can be applied by just setting “100%” on all three of the Red, Green and Blue components. This is nice because the history stack of this image can now also be saved into a style without having to manually pick the film base for each image. Just keep in mind that when you save the style, the mask image for the composite will have to be manually selected when applying to a new set of scans. After selecting the image the for the first photo the module can just be copied to the other images though.
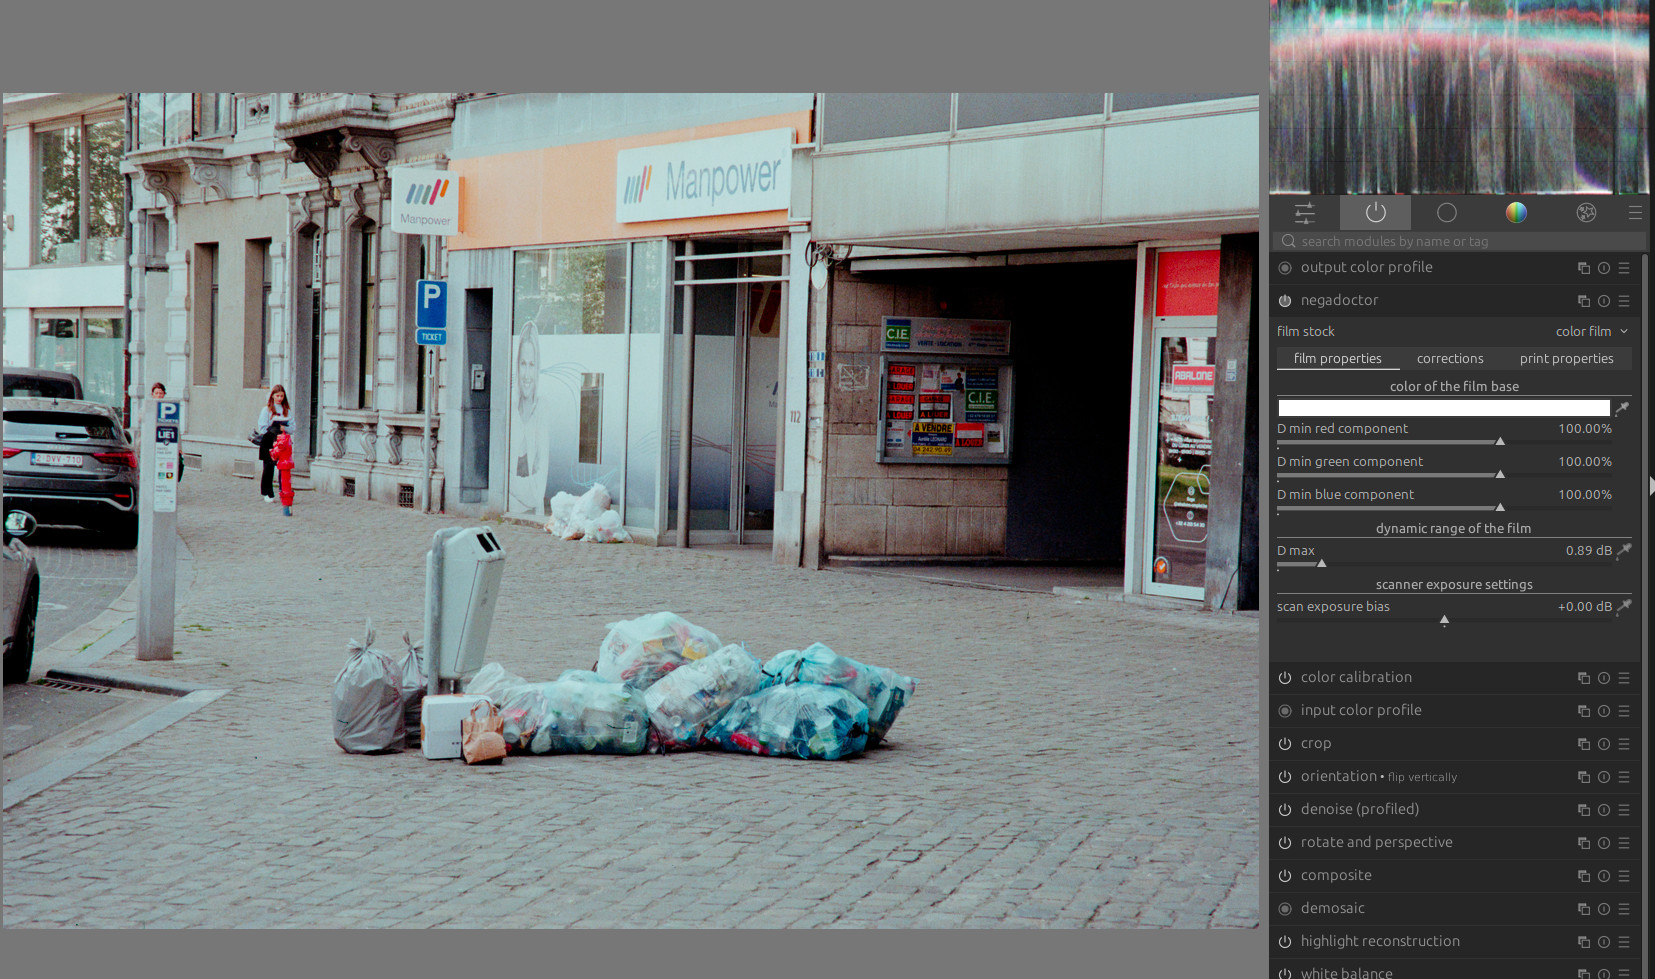 This is by far not the final image I would be happy with. The point is to show that the uneven color cast is gone.
Confirming the results
One way to confirm that this method actually works is to just set the composite mask onto a copy of the baseline image.
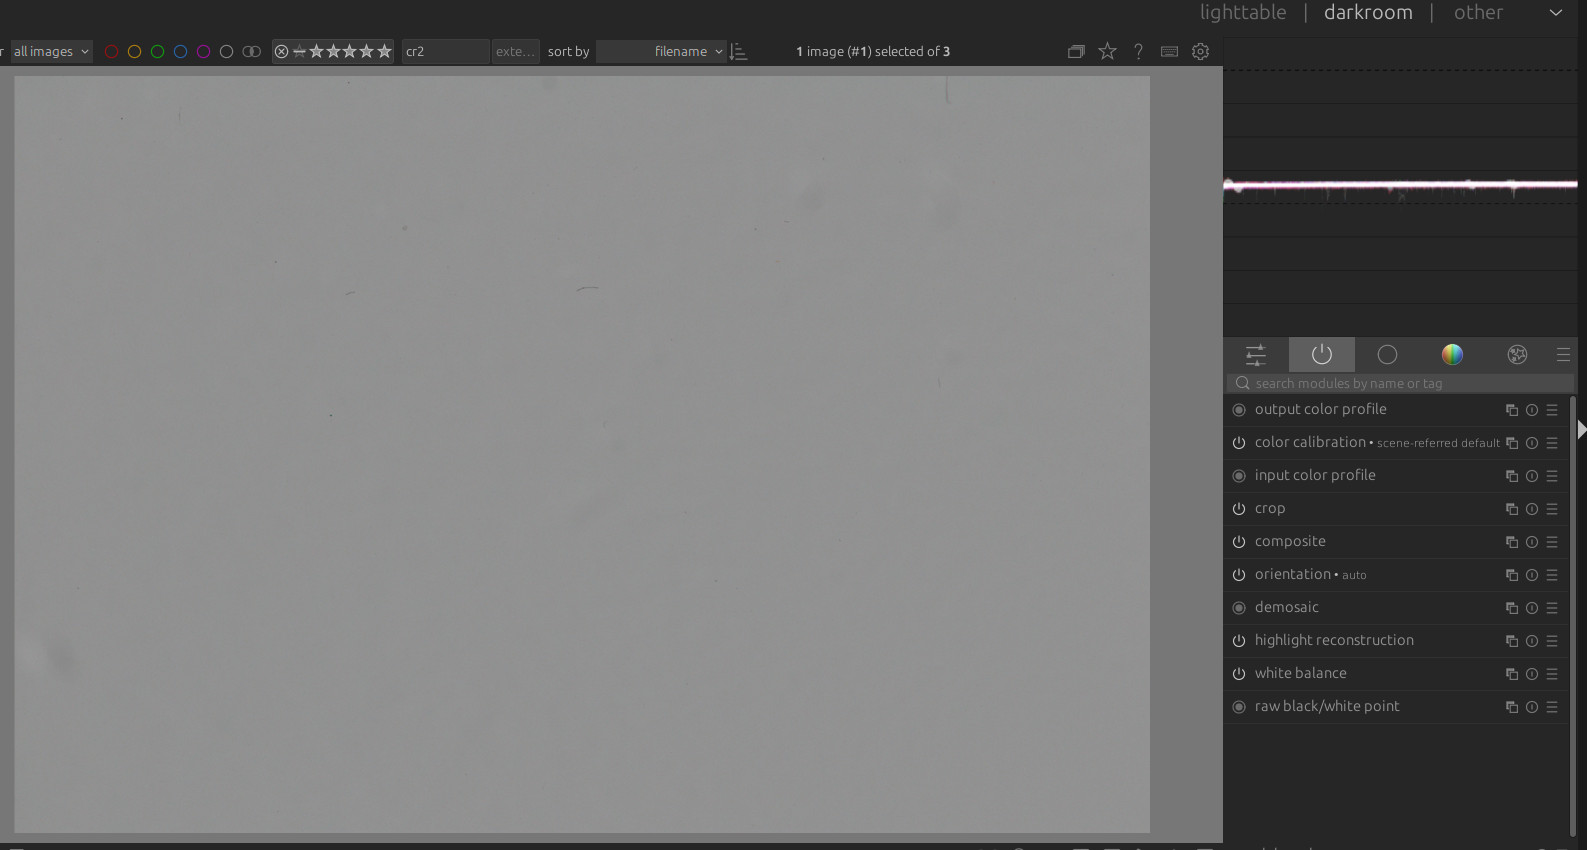 The fulcrum slider now acts like a basic brightness slider which I dialed down a bit as otherwise the image was almost pure white.
The waveform is now a perfectly straight line - no vignetting, no color shifts. You can even still see all the dust and imperfections on the baseline image. Neat!